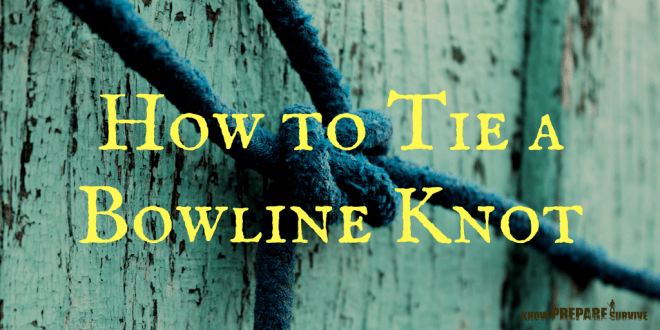
Bowline Knots: Uses, Variations, and How to Tie One
This post may contain affiliate links. Buying something through these links doesn't cost you anything and helps support Know Prepare Survive. For some light reading, check out our affiliate disclosure.
There are a lot of different knots out there in the world.
Table of Contents [show]
You could spend years learning them all and still come across new variations.
However, only a few have withstood the test of time to become one of the four basic maritime knots.
One of those is known as King of Knots.
That knot is the bowline knot.
Why You Should Know How to Tie a Bowline Knot
The bowline knot turns the end of your rope into a loop.

Loops make it very easy to attach your rope to something else or to use your rope to attach two somethings together.
The bowline knot is easy to tie. It is also easy to untie; if it is not under load, you can just shake it out.
More importantly, it is easy to untie after having been subjected to a heavy load.
What are the Uses for a Bowline Knot?
You can do many things with a loop at the end of your rope.

It has been used by sailors for hundreds of years if not longer. There are so many things you can attach together on a boat with a bowline knot, plus you can use it to tie the boat to the dock.
The FAA also recommends tying down your light aircraft with a bowline knot.
Bowline knots are used by climbers to attach themselves to their harnesses and to anchor the other end to something heavy.
If you’re in bear country, stick your food in a secure bag and hoist it into the trees with a bowline knot.
Speaking of camping, you can rest easy in a hammock if you’ve used a bowline knot to attach it to the trees. Unlike some other knots, it strengthens under load.
The bowline knot also makes a great rescue knot. It’ll hold securely onto the person and, if necessary, the person being rescued can tie the knot with one hand!
There are many more uses for a strong loop on the end of a rope.
How many can you think of?
How to Tie a Bowline Knot
There are two ends to a knot, the standing end and the working end.

The working end is the part you move around to tie the knot.
The standing end is the rest of the rope that just lays there like a lazy rabbit.
Lay the rope or paracord so the working end is facing toward you and the standing end is away.
Take the working end and, with plenty of extra length, make a small loop in the line. It should lay over, not under, the standing end.
Pass the working end through the loop from below.
Cross it under the standing end then back through the loop, from above.
Pull the working end and the knot should tighten into a secure loop!
How to Tie a One-Handed Bowline Knot
One of the big advantages of the bowline knot, and what makes it such a good knot to know for survival situations, is that you can tie it with one hand.
Say you have one hand available because you’re holding onto something for dear life with your other hand. Somebody tosses you a rope. You catch it.
Sure, you could trust your grip enough to release with your other hand and grab the rope with both hands.
But you won’t be secured to the rope, so if things get chaotic, you may slip. Hopefully, the implications are obvious.
Rather than trust your grip, tie a bowline knot and secure yourself!
The first step is to pass the rope behind you and back to your front, so the working end is on the same side of your body as the hand with which you are holding the rope.
Choke your grip so about six inches of rope is hanging loose in front of your hand.
Move your hand over the long end of the rope, down, back toward yourself, then up and out. The rope should loop around your wrist.
Next, wrap the loose six inches around the long end, going underneath then above and back to the starting side.
Grab that loose end and pull it through the loop around your wrist.

Tighten. If you did it right then you will end up with a bowline knot looped around the long end of the rope.
It might take a bit of practice. But if you ever find yourself in a situation where a rope will save your life, you’ll be thankful for all that practice.
And if not, it still makes a good party trick.
Variations of the Bowline Knot
Despite its status as King of Knots, the bowline knot does have its weak points.
If you don’t keep it under load then it may work itself loose. Pulling it sideways can cause it to slip, and it can even capsize!
In the knotty would, capsizing means that the knot has rearranged itself into a different knot. If you’ve ever had trouble undoing a square knot, it probably capsized.
There are some variations on the bowline knot that overcomes these shortcomings.
Cossack Bowline
If you tie the knot around the loop instead of around the standing end you will get a Cossack bowline knot. This loop resists shaking loose and is also good for when you need to stretch the loop wide.
Some people call it the Eskimo knot.
Double Bowline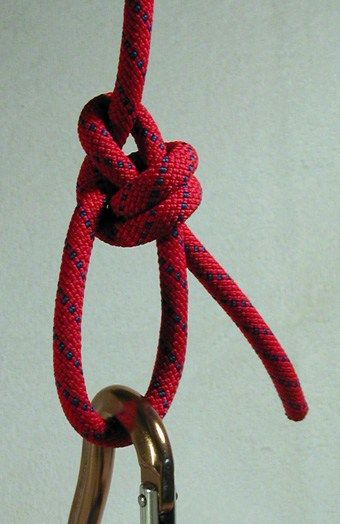
Also known as the round turn bowline, the double bowline gets its name from the fact that you wrap the initial loop twice instead of once.
Rock climbers who need to undo then re-tie their loops many times in a climb often use a double bowline.
Water Bowline
Another way to add more security to the bowline knot is to make two initial loops then overlap them, with the loop closer to the standing end on top.
Make sure to pass through both loops both times you pass through.
This version is also harder to undo by shaking.
Yosemite Tie-Off

For extra strength, you can add a Yosemite tie-off to the bowline knot.
Start off with a normal bowline, but you’ll need extra length in the working end after the second pass through the initial loop.
Then wrap the working end around the rope that had passed through the original loop, from underneath.
Pass it under the initial loop then up and through the part that hooked around the standing end. It should be parallel to the standing end.
Tightening the whole thing is very important. Hold the standing end and the bottom of the loop and pull to tighten the original bowline knot.
Then you can pull the working end and tighten the tie-off.
If you tighten with the working end first, you capsize the knot and end up with something quite insecure!
Conclusion

The King of the Knots will help you attach your boat, your plane, your gear, or even yourself securely to whatever you want.
Then, when you’re done, you can easily shake it loose and use the rope for another purpose.
Practice the one-handed method of tying a bowline knot, and one day this king may save your life!

10 Essential Survival Skills You Can Learn in 1 Day
Claim Your Copy of Our List of 10 Essential Survival Skills That You Can Learn in One Day!