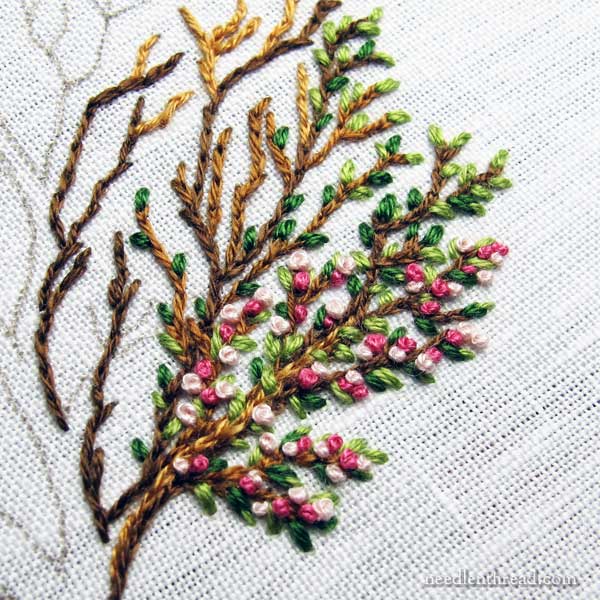
My little secret pleasure this week has been working on this embroidered tree. When I’m supposed to be doing Other Things, I find myself picking this up and putting in just a few (or so) little stitches.
I overcome the guilt by telling myself that at least I’m accomplishing Something.
Besides, it’s fun to watch it bloom!
Because I’m using a non-divisible thread on this wee tree (specifically, coton a broder #25), I’ve been playing around with different ways to change the size of the French knot blossoms.
I thought I’d share some tips with you on how to successfully vary the size of French knots when you’re working with one thread.
Now, it might seem a no-brainer, working big French knots and little French knots on the same project. There are lots of ways you can go about adjusting the size of the French knots you’re creating, but the most reliable, stable way is usually to change the weight of the thread you’re using.
For those who have difficulties with French knots, or who achieve accidental inconsistent results with them (when you want consistent results), there are a few ways you can ensure consistently good French knots. One of these is to constrain your knot-making procedure to two wraps on the needle.
I know, I know! There are many stitchers who are not two-wrappers, and that’s ok! I’m just putting out a suggestion here for folks who have difficulties achieving consistently successful French knots.
So, two wraps only, despite the size of the knot that you’re trying to achieve.
If you want to decrease the size of the knot, decrease the weight of the thread – use two strands of floss instead of three, for example, or use a finer thread altogether.
Similarly, if you want to increase the size of the knot, increase the weight of the thread – use four strands of floss instead of two, for example, or a heavier thread altogether.
While some stitchers advocate the three-wrap knot, I generally don’t. Two wraps are enough for me. But if you want three wraps for a heavier knot, sure. Go for it!
But normally, I’d say don’t go beyond three. The more wraps you add to the knot, the more unstable it becomes, and the less likely you’ll be able to control it and to keep it secure, especially in post-embroidery finished use. If you want a knot that really stands up off the fabric and is very textured and heavy, but quite stable, try something like a drizzle stitch with only three or four wraps on it.
But this all begs the question: what if you’re not using a thread that comes in different weights or that allows you to increase or diminish the number of strands? What if you’re using a non-divisible thread that only comes in one size in the particular color you’re using?
Or what if you simply aren’t into changing threads out when you want a bigger or smaller knot? (I’m definitely not. Who wants to keep changing threads?)
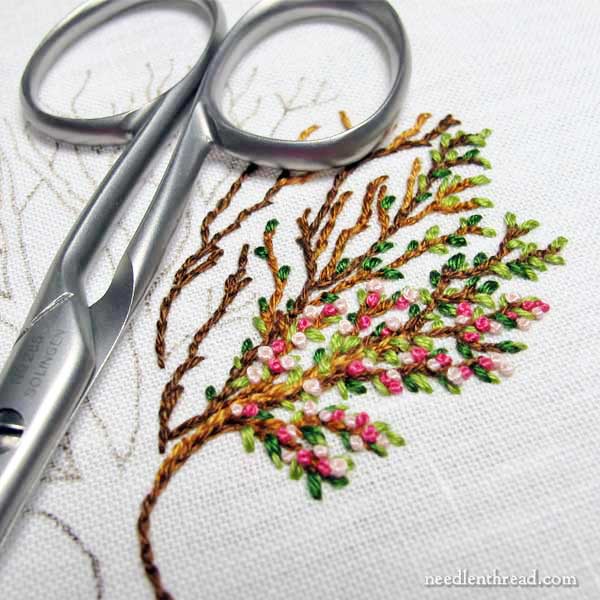
Before we go any further, to give you some perspective on the size of the knots we’re talking about, these are my 4″ embroidery scissors next to the tree. The scissors look huge. So the embroidery is pretty small, but it’s not microscopic.
When I zoom in on the French knots below by cropping the photo, I just want you to know that the knots are not as big as they look and that the up-close view is why you’ll see a general fuzziness to the embroidery. It’s not that the embroidery looks fuzzy to the naked eye, even when you’re up close to it. But when you get really close to it with the camera lens, you’ll see the thread fibers.
Nothing like pitching a few excuses ahead of time, eh?
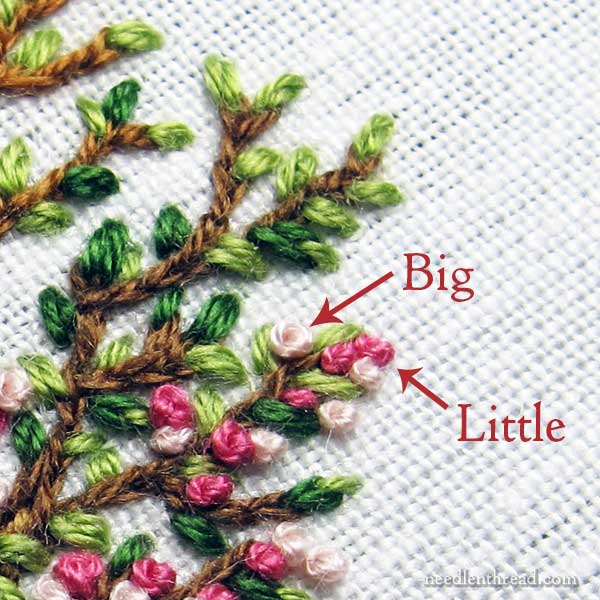
So, here they are. Some big knots. And some little knots.
The difference in sizes is not accidental. I wanted a bigger knot where the big knot is, and I wanted a cluster of three tiny knots where the little knots are.
I don’t switch my thread in situations like this, when I’m working a whole lot of knots in the same colors and threads on the same project. And I don’t change the number of wraps (though feasibly, you can diminish knots to tiny by using one wrap, or increase them to larger and loose with three wraps).
Instead, I change two things to help me achieve the size knots that I want.
1. Increase the Tension on the Working Thread
For smaller, tight knots, I increase the tension significantly on the working thread as I pull the needle and thread through the wraps, to make sure that the wraps really hug up to the thread and make a tight little knot.
The only way this can work successfully without causing repeated heartache and grief each time you make a knot is by using a milliner needle, so that the eye passes easily through the tightened wraps and by being absolutely certain you’re not going down into the same hole in the fabric whence your thread first emerged.
The latter point is very important whenever you’re making a French knot, but it becomes even more important if you’re making a tiny, tight knot. If you go down in the same hole that your thread originally emerged from, a tiny tight knot will most assuredly pop through to the back of the fabric.
If I want a little knot that doesn’t look as tight, then I would decrease to one wrap. But for buds on a tree, I want some tight little closed knots, and increasing the tension on the knot works well to bring that about.
2. Change the Size of the Needle
Instead of switching thread, when I want plump but loose-ish knots, like the light pink one indicated by the arrow in the photo above, I switch the needle I’m using. Using a slightly heavier needle will make a larger knot, without having to rely on loosening up the wraps around the needle too much and risking a mess.
The latter approach might seem a bit extreme, but it works really well for creating consistently sized plumper knots. Just use a plumper needle!
Stitch Purposefully
Gosh, that’s a lot of rambling about French knots.
I guess the upshot is this: when you want your stitches to do something specific, think about them. Stitch purposefully.
Instead of mindlessly stitching a bunch of French knots, for example, think about the effect you’re trying to create with the French knots, and determine what adjustments you can make with each stitch, to bring about the effect you want.
So, those are my French knot tips for the day. I’ll try not to be tempted away by the tree this morning – I’ve got a couple Bigger Things to finish, to share with you soon.
See you on the morrow!
Related Articles
- August 10, 2015 Weekend Stitching: Lots of Knots and Little Leaves
- February 6, 2014 Comparing Cotton Threads, Stitched
- July 28, 2015 Branching Out with Split Stitch